Pathing
Now the fun begins, as we begin the paint! Open the path palette and click the small icon “create a new path”, then select the pen tool (make sure it is the first one in the menu, the cursor now has a pen shape, without any + or – next to it. With this pen tool, we will draw the green shape covering the tail and rear fuselage. First click a point at the lower fuselage where the green reaches the bottom, then click at another point near the top of the tail, then at the aft tip of the tail, at the lower end of the tail right above the #2 engine exhaust, and finally we will close our shape by clicking again on the first point. You will notice that when you select the first point again, a small circle will appear next to the pen shape on your cursor, telling you that if you click now you will close the shape, which is what we want. We now have something like this (I edited the screenshot, adding red points to show you how I created the shape)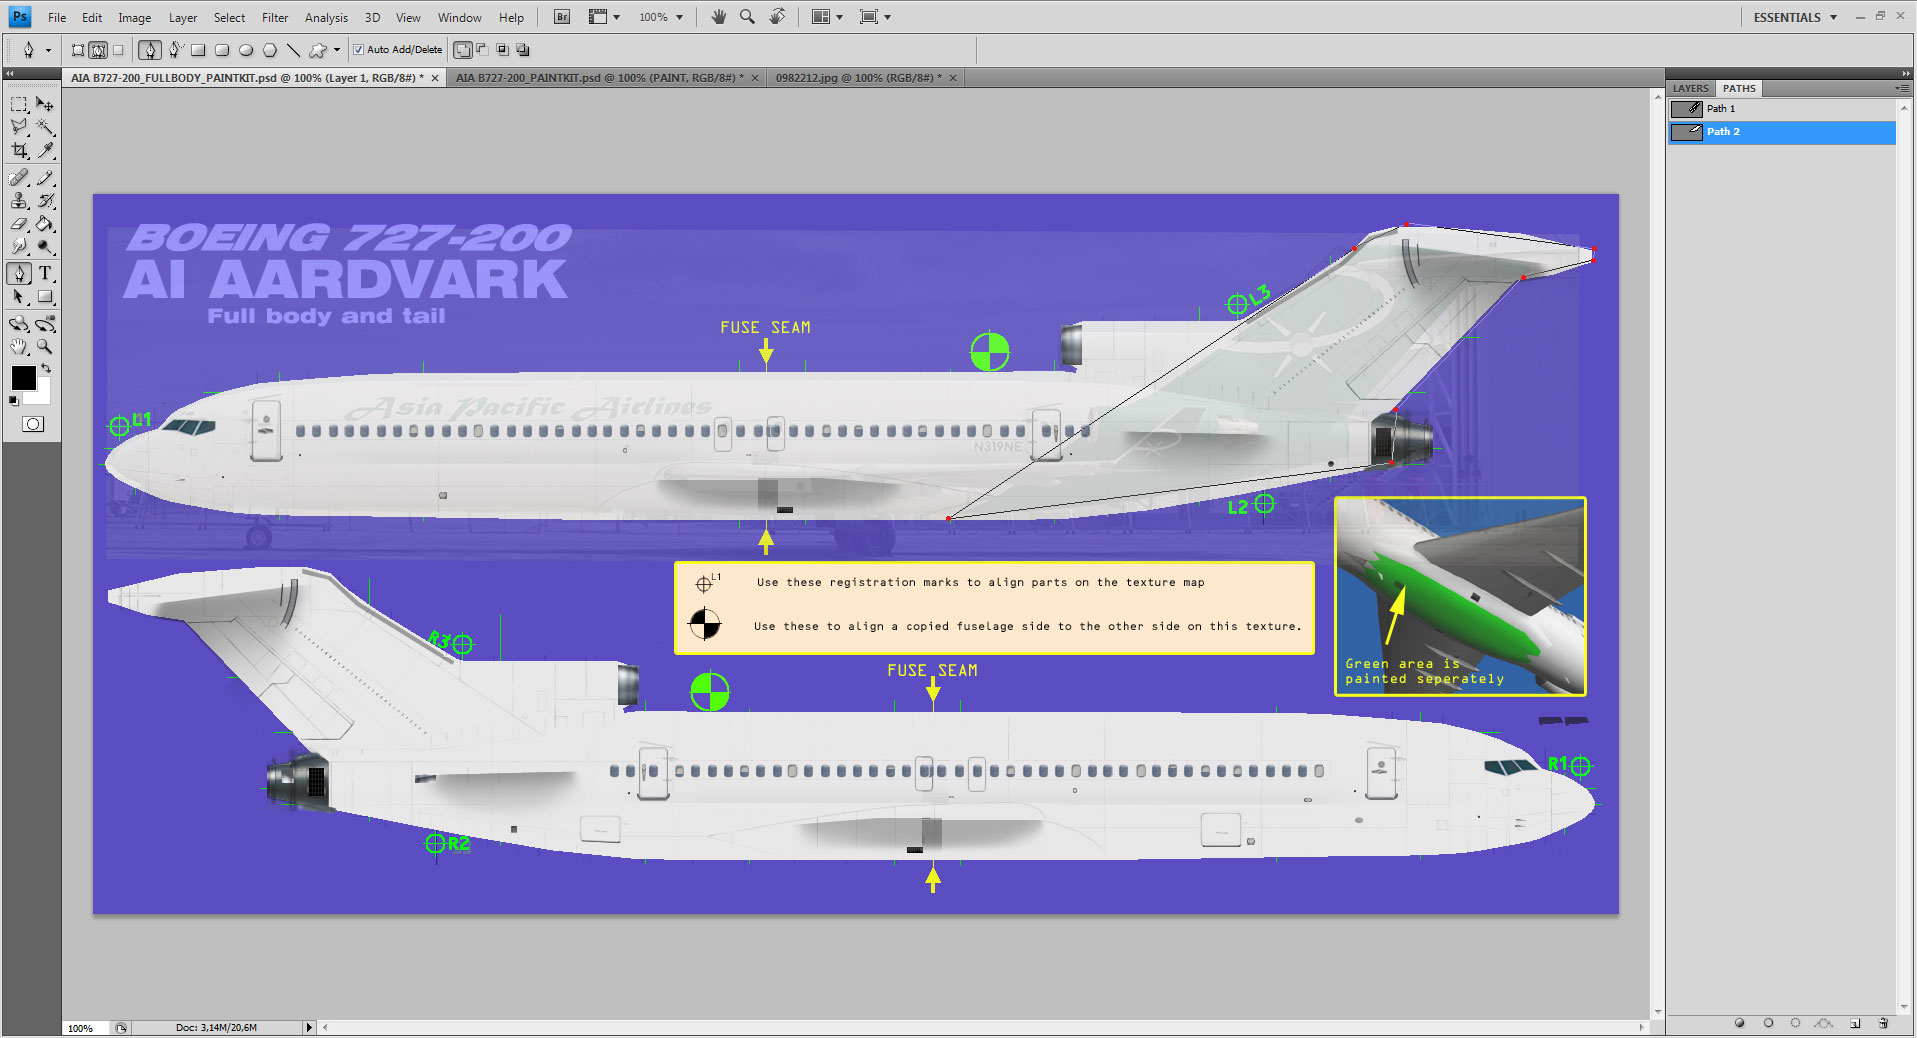
The problem with our shape now is that it is all straight lines, but of course we will fix that. The pen tool has several options, and we will choose the “add anchor point” one, which is the pen icon with an added + sign. Click once on the lower fuselage segment, then on the upper tail one, and two points on the segment going up the front end of the tail. If you add more and want to get rid of the unwanted ones, you can always edit/step backward, or use the “remove anchor point” (pen tool with the – sign) and click on the unwanted anchor point you added.
We now have something like this
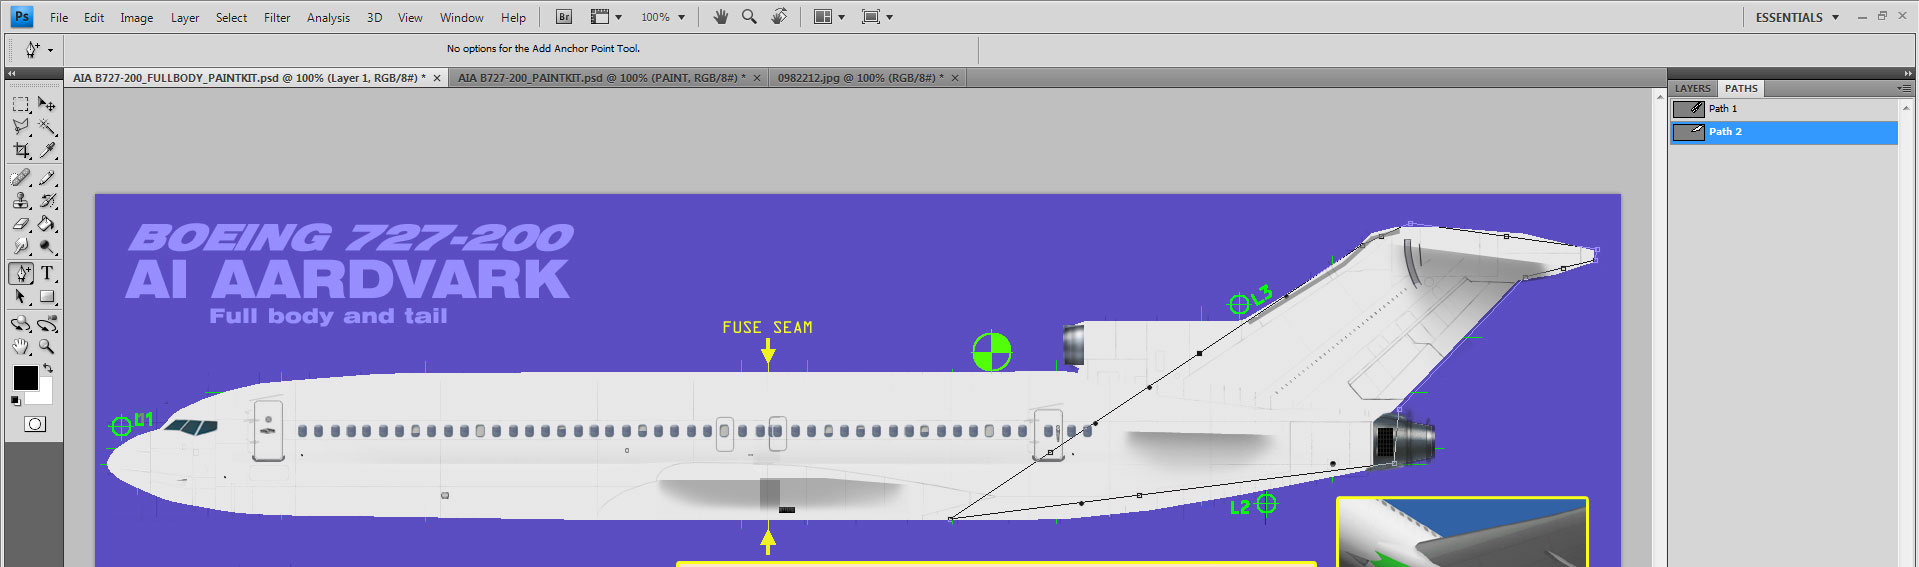
Using the direct selection tool (the WHITE arrow below the pen tool) we will move the anchor points on our shape until we find the exact one we want. Don’t worry if you don’t manage to get it right at once. It does take some practice but soon you will get comfortable with it. And you will be able to create very complex shapes. But right now, we have a relatively easy one to do, so you should be able to get away with it without major efforts. First, we will select the lower fuselage anchor point we just added, and (with the direct selection tool) drag that point down. You will notice that what was a straight line is now curving down to follow the lower fuselage shape. You will also notice that each added anchor point has handles that you can pull on each side of the anchor point to refine the shape of your line. When you are happy with the result, you can do the same to the upper tail segment, to get the line gently curve up along the upper tail shape. Now, we will get to a little bit more tricky part. The front part of the shape. We will need to see as much as possible how it fits the fuselage. Close up pictures will help to notice small details that can be used as guides. In this case I found a tail close up on flickr.
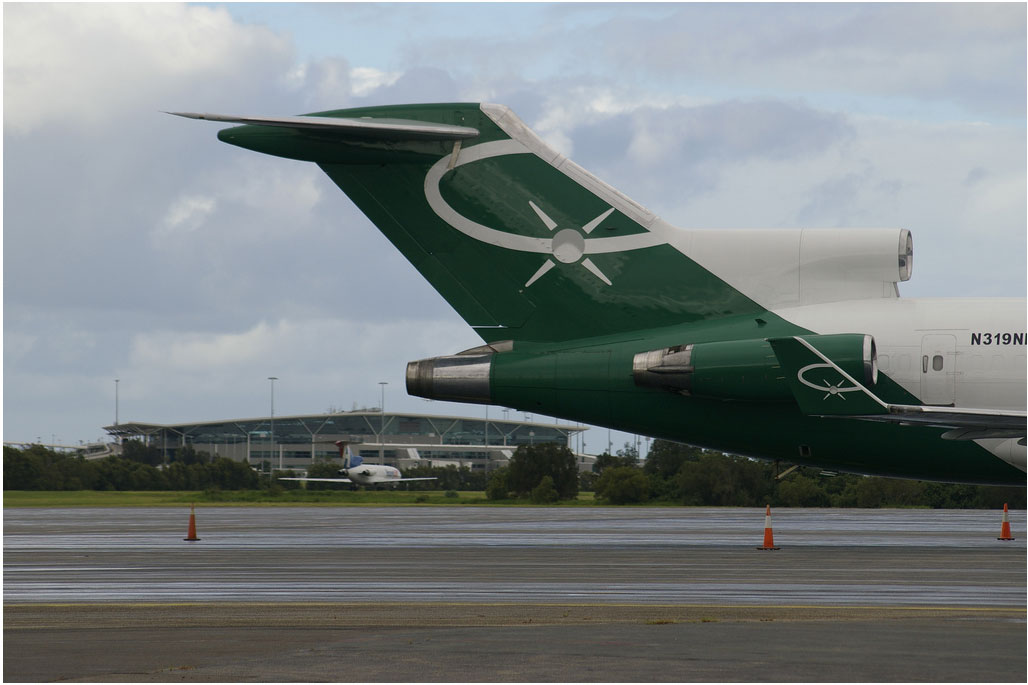
We can notice several things:
1. the leading edge is much thicker than the default one, and extends back to the seam going down the tail.
2. the green section is flush with the leading edge and goes down the tail straight along that le.
3. It slightly curves down around the fuselage, passing the lower edge of the last plugged window, overlapping the lower corner of the back door, and tapering to the lower fuselage right behind the wingbox bulge.
Back to the drawing board, we will follow these guidelines to have the proper shape. Earlier, I told you to add two anchor points to our shape’s front line. When you add an anchor point, it comes by default with handles so you can make curved lines. But you can also change that and remove the handles to make straight lines instead. Select the “convert anchor point” tool (the last option of the pen tool) and click one of the anchor points we added to the front shape line. This will allow us to have a straight segment that will go from the upper front corner of the tail down to where the tail meets the fuselage, and we will position this segment to follow the seam running down the tail just behind the leading edge, going back using the direct selection tool. This same tool will help us position the last remaining anchor point somewhere along the fuselage section, and play a bit with the handles to get the right shape and using the guidelines mentioned earlier: the line should pass right at the lower corner of the last window, very slightly overlap the lower door corner, and finish just behind the wing box bulge.
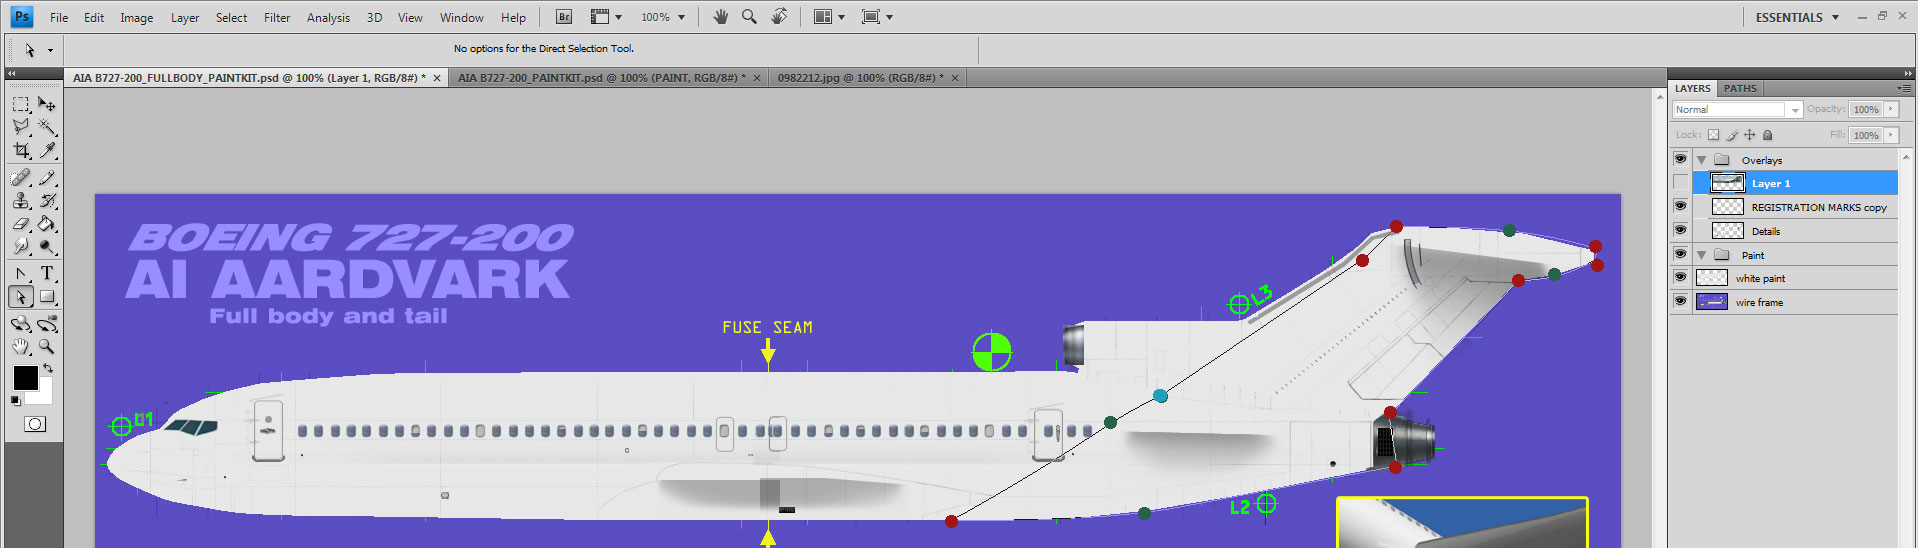
We should now have the proper shape (again, I edited the screenshot to make things clearer. The red dots are the original shape, the green ones the added anchor points, and the blue dot is the added anchor point that we later converted to keep the upper segment going up the tail a straight line) You might want to name your path, that will save it and make it easy to identify later. “green tail” seems appropriate here