Gradient
Et voila! No more leading edge. Now we will paint our own, and as usual we will open the path palette, create a new path, and with the pen tool, we will create our leading edge shape. Once tweaked to the right size and shape, we want to paint it. We can use a light grey for that, but since it is a rather shiny aluminium shade in real life, we can use another technique to simulate that metallic shine. First, let’s select our new leading edge path, then go back to the layers palette and create a new layer. From the upper main menu, let’s click layer/new fill layer/gradient. A new dialogue box will open from which we will be able to select many options. In this case, let’s just click ok. A new dialogue box opens called gradient fill, with again a number of options that will allow us to create the metallic reflection effect we want. In the upper box, click on the gradient colour strip, and you will trigger yet another window
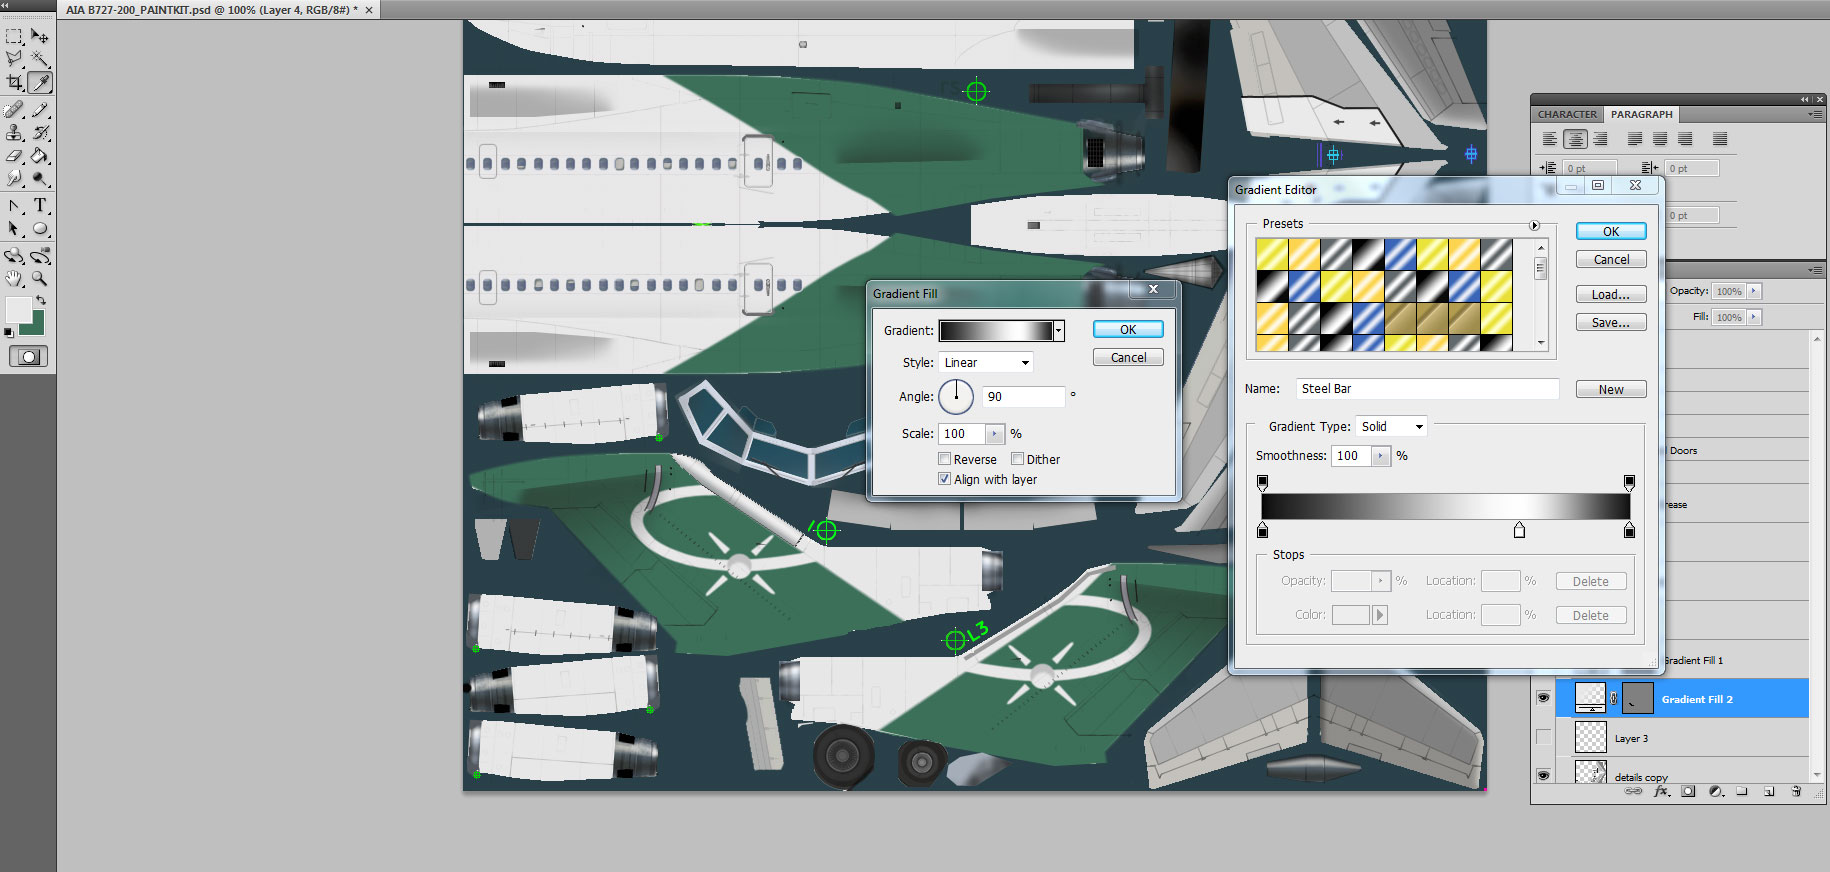
What we have basically is a dark grey/black background with one or more lighter /white stripe with a smooth transition from black to white to black again, and this will simulate the metallic reflective aspect of the polished metal. Clicking on the pen symbols, we can change the colours, and pulling them as sliders we can adapt this effect to fit our shape. We will then click ok and go back to the first dialogue window, where we will select the correct angle and scale to align our reflexion to the desired effect.
I wanted to get a lighter reflexion at the front of the leading edge, while the back showed a darker metallic tone, and here is the final result.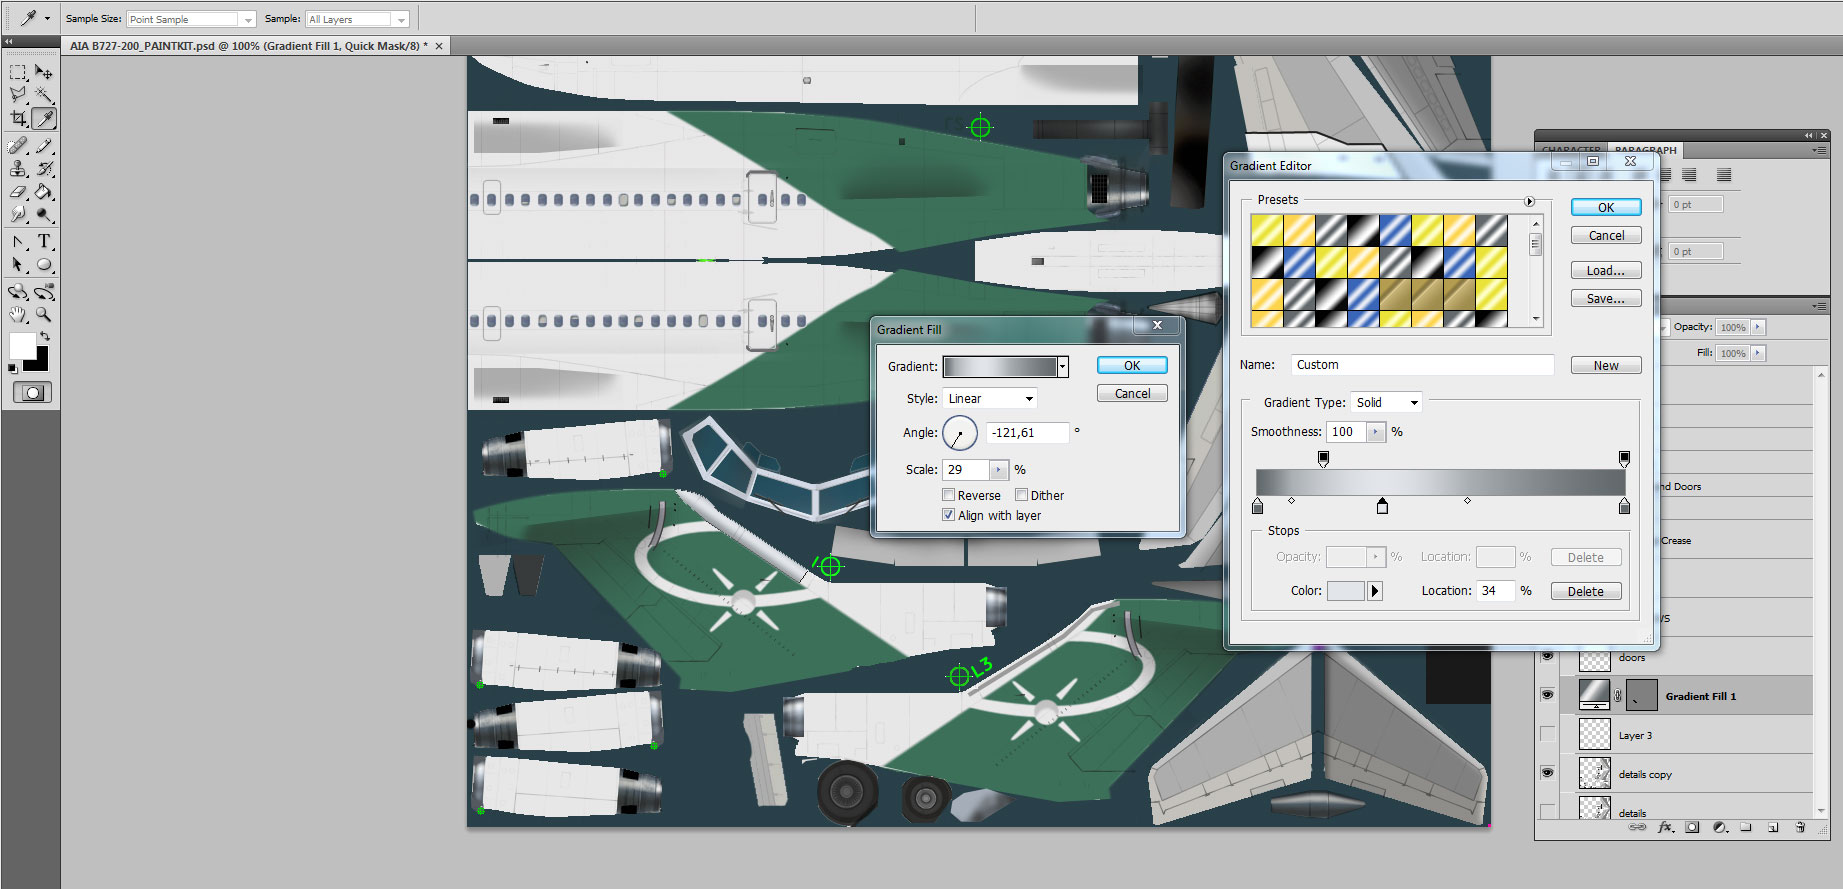
You can keep experimenting until you find a result that satisfies you, even if it doesn’t look like mine. Once you are happy with it, time to duplicate it to the other side. First, let’s go back to the details copy layer and erase the original leading edge as we did before, select the gradient layer we have just made and duplicate it. We now have highlighted in the layers palette a new gradient layer called Gradient Fill1 copy, and you will see next to that name two small icons, one showing a miniature of what is on this layer, and another one showing the gradient shape and colours. Double click on this gradient icon to open the dialogue box we have seen before. Below the angle and scale commands, there are three option boxes. Untick the last one “Align with layer”, and click ok to close the dialogue box. Go to edit/transform/flip horizontal and drag the duplicated element to fit the other tail half. You will probably notice that the reflection is not exactly symmetrical to the one on the other side. If this is the case, just open the gradient dialogue box, and move the angle on the circle until you find the right position.
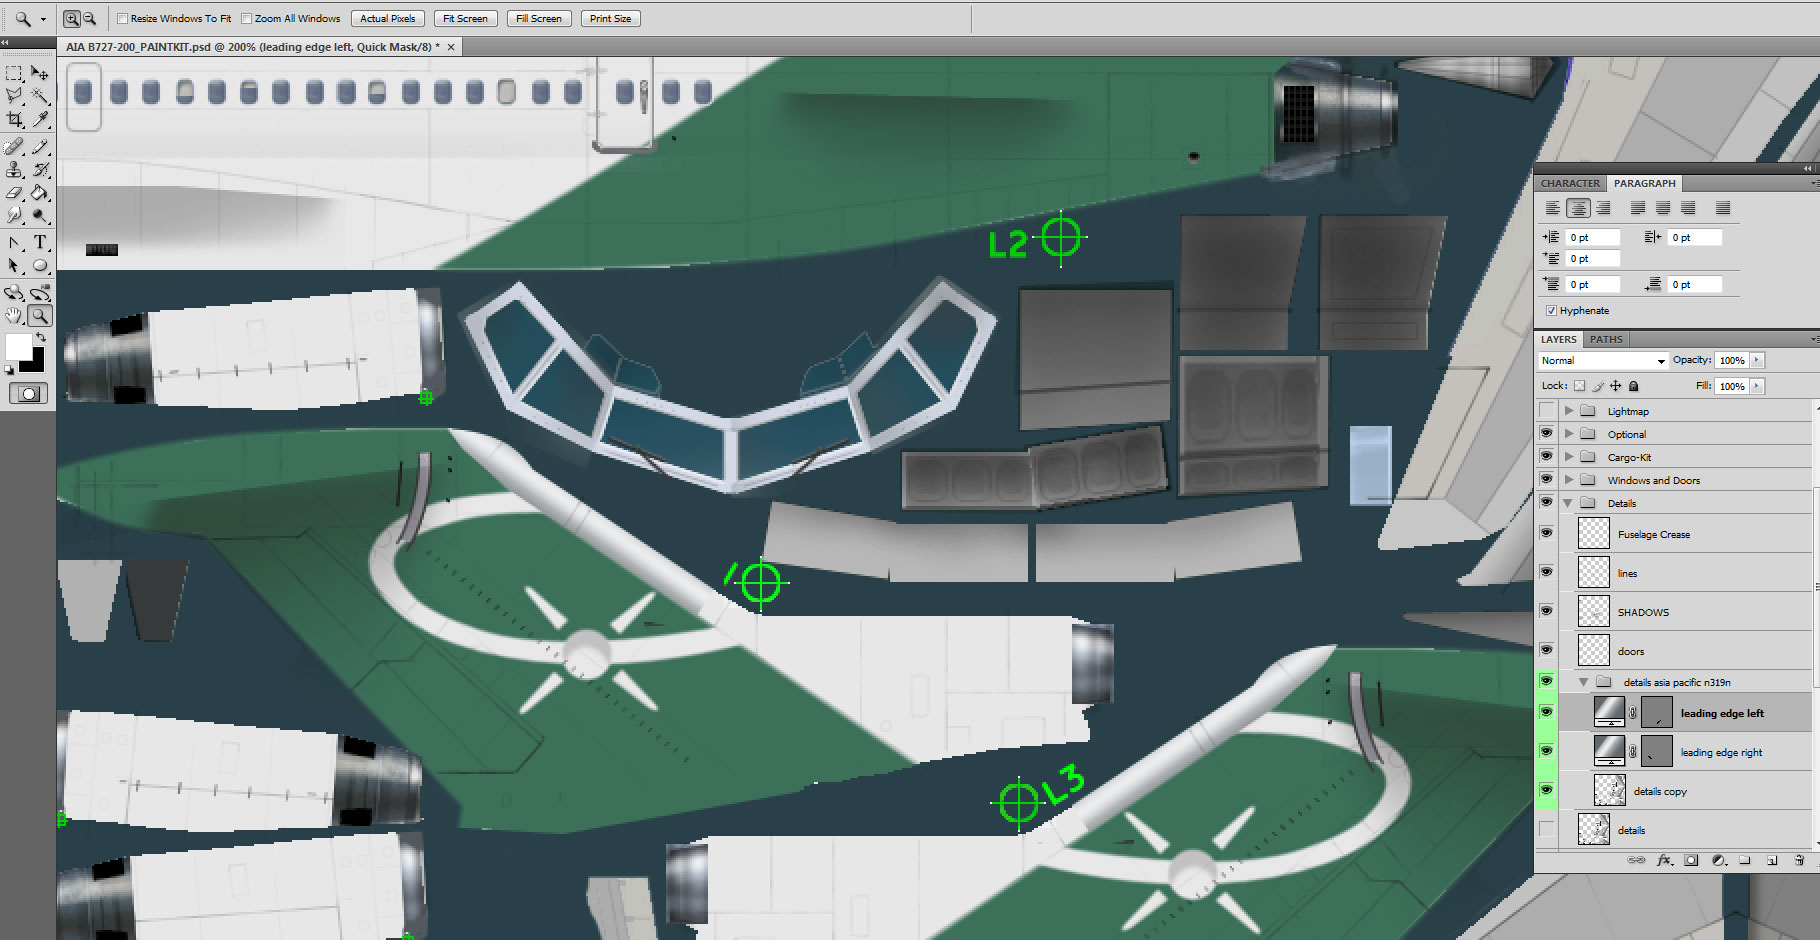
The next thing we want to do is move the pitot tube slightly downward to match the position as seen on the pictures. This detail is on the details layer, so we will select the duplicate details layer which is the one left active, and from which we have already erased the original leading edge, and using the rectangular marquee, we will drag it over that pitot antenna. Once that area is selected, we will use the move tool to drag it a bit further down, between the front star beam and the lower ellipse part, then we will apply the same process to the other tail half. Once we are done, let’s right click anywhere in the workspace. This will open a drop down menu, from which we will click on the first option, “deselect”. Otherwise, the last area we had selected with the rectangular marquee would remain active, and any further action we would take would only be possible to implement in that specific area. Here is how our tail section looks like now. You will also notice in the screenshot below that I have created a sub-group in the details areas, where I have located the detail layers we have changed or added specifically for this repaint. And I have also added a colour to this group so that I can easily spot and identify it later. This way, it will be very easy at a later stage to deactivate all the groups related to this repaint and revert to the default layers, or if we ever need to return to this repaint, say for an update, at a later date, we will very easily identify which layers need to be activated.