Painting
Now we will use this shape to paint the green tail and aft fuselage. We will use the eyedropper tool to find the right colour. How you chose a colour is really up to you. I usually find a picture that is not too dark or too bright, with clear skies and decent sunshine. Then save the picture, open it in PS and click the eyedropper to on a “medium” spot on that picture to select the colour and possibly tweak the colour until it looks right to me. In some cases, you might find the exact colour values used by an airline, but it is rather the exception. Never trust the colours featured on the airlines websites, they are usually waaay off from the ones on the aircraft.
Here is a good example as to why use layers. We will use a specific layer for that green tail and fuselage. So that if we decide later to change the green colour, we will just need to replace this layer, without having to start the whole painting process from scratch!
So we now have selected a green colour that seems to match the real thing, and we can see that it appears in the small square at the bottom of the tools palette. We can apply it to our fuselage. Let’s go to the layers palette and click the small icon to create a new layer. Name this new layer “green tail” and make sure it is selected (highlighted) And now back to the path palette, select the “green tail” path we created
by the way, don’t forget to SAVE your work regularly, and generally once you are happy with a result, this will save you huge frustrations and wasted time! ;-)
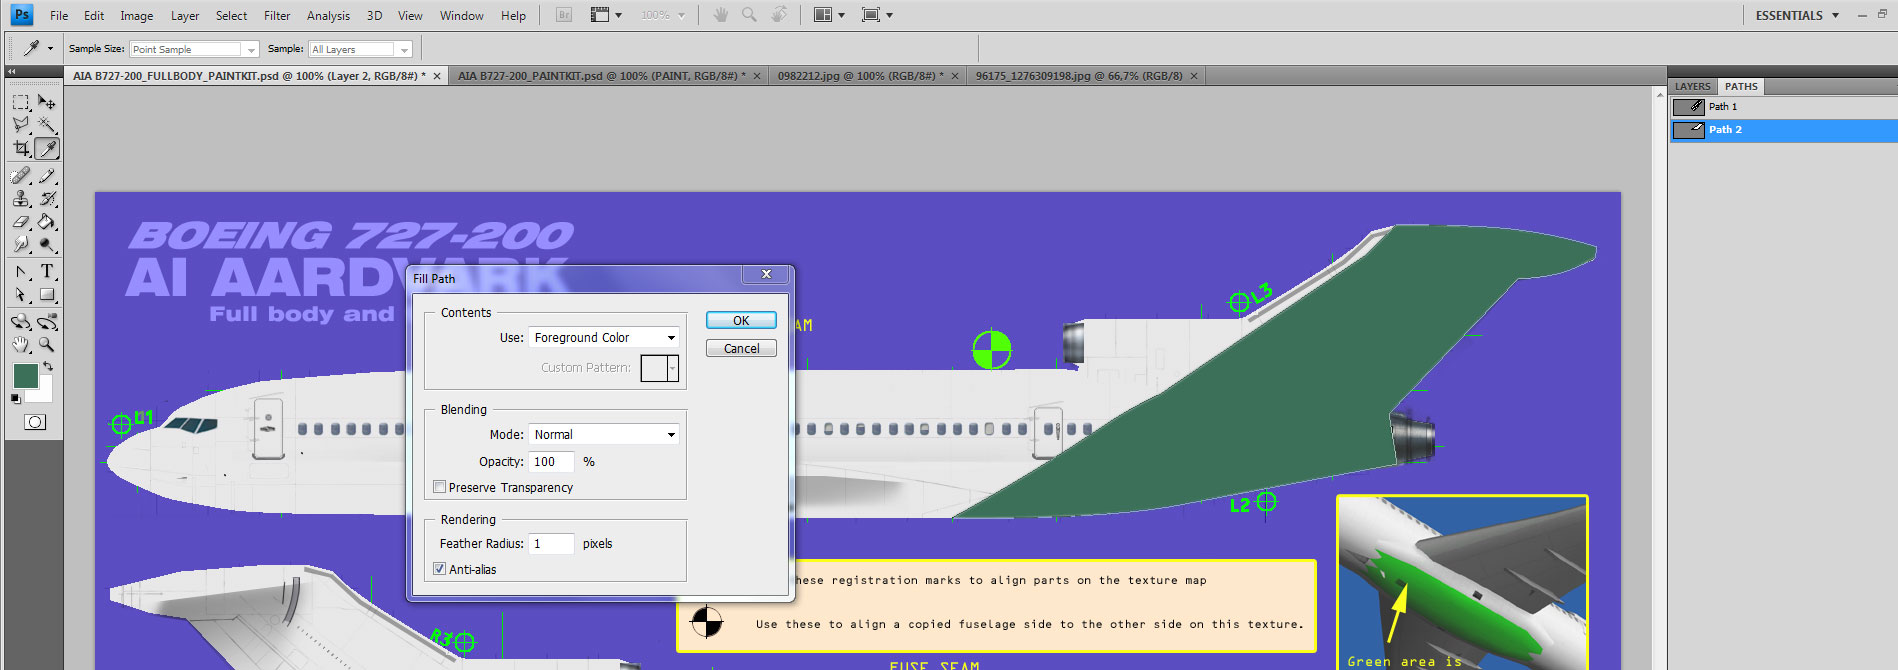
and RIGHT click that path in the path palette. A fold down menu appears in which we will select “fill path”. A new menu window will pop up in which we will select first the colour, in this case the foreground colour, we will keep the default blend values of normal and 100% opacity, but we will give the feather value a 1 pixel and make sure the anti-alias box is ticked. Click ok et voilà! You now have a green layer over your paintkit!
Now, let’s go back to the layers palette and select our “green tail” layer we just filled up with colour. Make sure it is highlighted so that we are actually working on this layer and not messing up another one by mistake. In the upper menu, select Filter/Sharpen/sharpen. And again, filter/sharpen/smart sharpen. A new window will open, you can keep the default values and click ok. Your layer is ready! The last steps we did is in fact a little trick to avoid the awful “scale effect” in curved lines and shapes. If we just draw shapes by default, we will get sharp pixel edges that will show ugly “scales” as they curve up or down. By adding the 1pixel feathering, we add a slight blur that will smooth the curves down. Applying the filter afterwards will sharpen things up, reducing the blur effect but still eliminating the scale effect. You might want to experiment with different settings and filters but from experience this is what works best for me in most cases.
If we had other livery elements across the fuselage we would draw them here, but in this case, we don’t need the full fuselage psd any longer, so we will transfer what we did to the actual paintkit. To do this, we will just have to select all or parts of our layer and simply copy and paste it into the pk. But we want to make sure that the parts will fit their exact position, as we don’t want to waste time later moving the layers back and forth trying to have the parts fit together. As you will notice, the original authors added cross-hair marks at some points across the paintkit, that will help us adjust the parts. Using the magnifying glass tool, we will get a close up of the tail cross-hair and (still making sure that we are working on the “green tail” layer) we will use the pencil tool (make sure the brush size is 1pxl) to draw over the cross-hair to pinpoint its location. We will find the same cross-hair sign on the main pk (hopefully at the very same location) so all we will have to do is match that location, and we will be sure that our new layer(s) are correctly positioned on the main pk. I personally keep it to a minimum and just put a mark on the cross-hair tips and centre, but you can draw the whole thing if you prefer. We will then do the same with the cross-hair at the bottom of the aft fuselage. (we won’t need to mark the front fuselage cross-hair since in this case we have nothing to transfer to the front fuselage section on the main pk)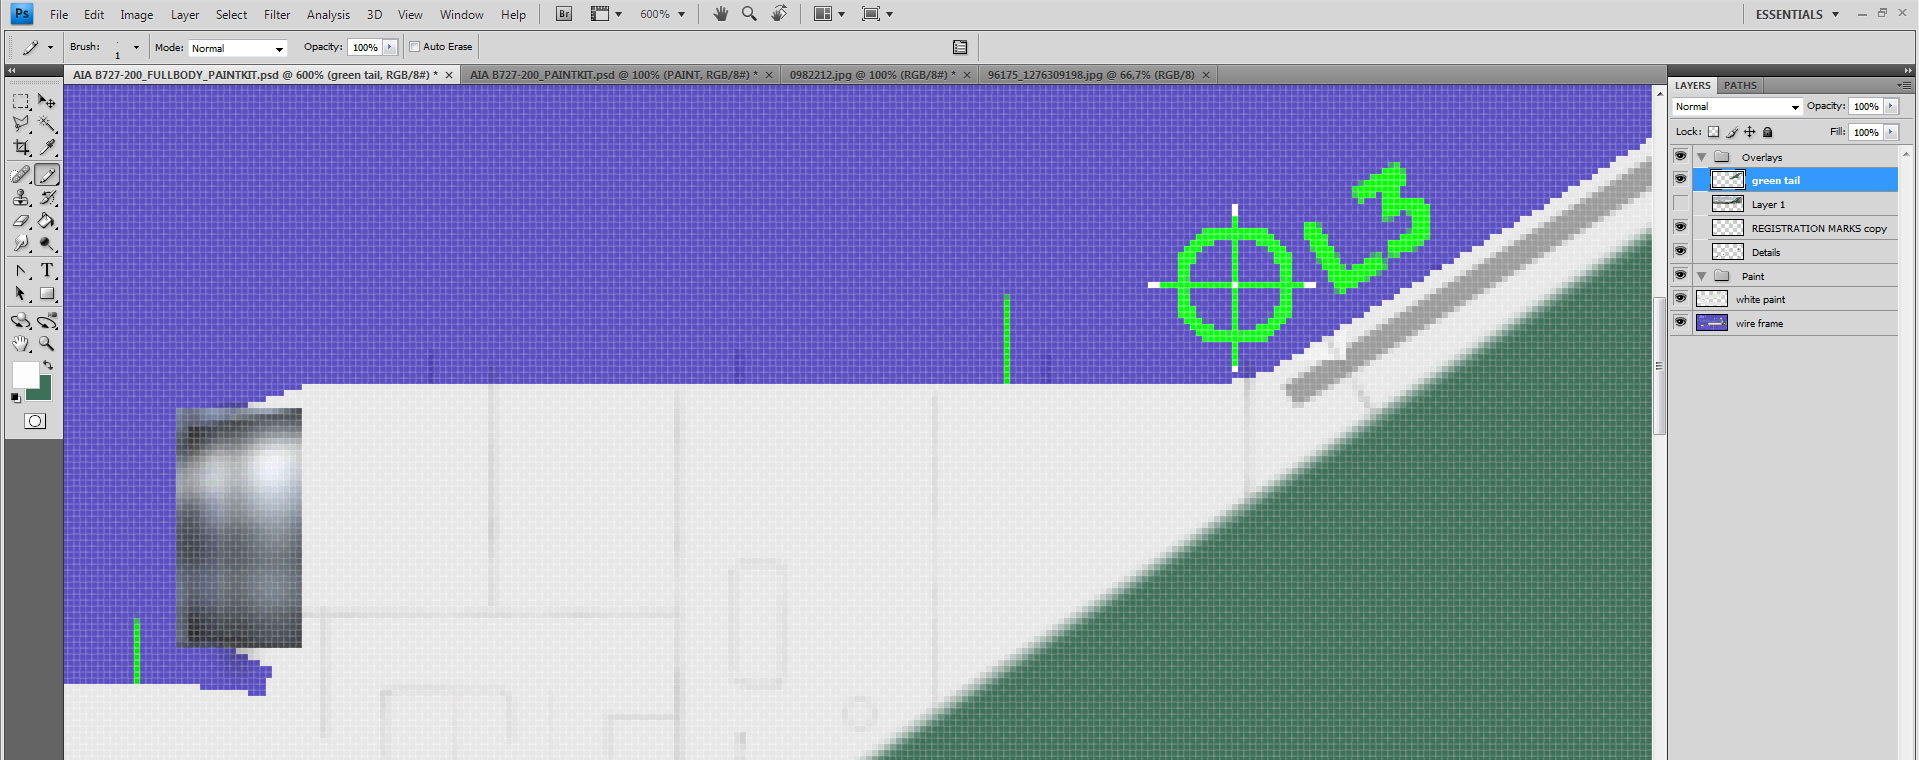
Now we are ready for the transfer. Use the rectangular marquee tool to select most of our green tail layer, and from the top menu, select Edit/copy.
We will open the main pk and from the upper menu, select Edit/paste, thus creating a new layer with our green tail. You will notice that unlike the previous psd, we already have lots of layers in the layers palette, organized in groups. One of them is called “paint” and this is where you should put the new layer we have imported, so that it will rest below all the other layers featuring the windows, doors, and finer details. But hopefully, you will not be totally put off by this tutorial, and you will use this pk to make more repaints in the future, so instead of just having one “paint” group, you will want to create a new group for each new repaint you do. In this case we will create a new group called “asia pacific N319” where we will put our paint layers covering this livery. If needed, we will be able to create other groups inside this one. Make a habit of getting all your layers in a tidy configuration that you can easily navigate, otherwise it will soon become extremely confusing and time consuming finding your way around the layers.
Select the move tool to move the layer around and use the magnifying glass to enlarge the thing as much as needed to make sure the cross-hair matches pixel per pixel. Now you are sure that your layer is correctly positioned. Should you notice that it doesn’t it means that we f***ed up somewhere along the way, but hopefully we will be happy with the result so far :)
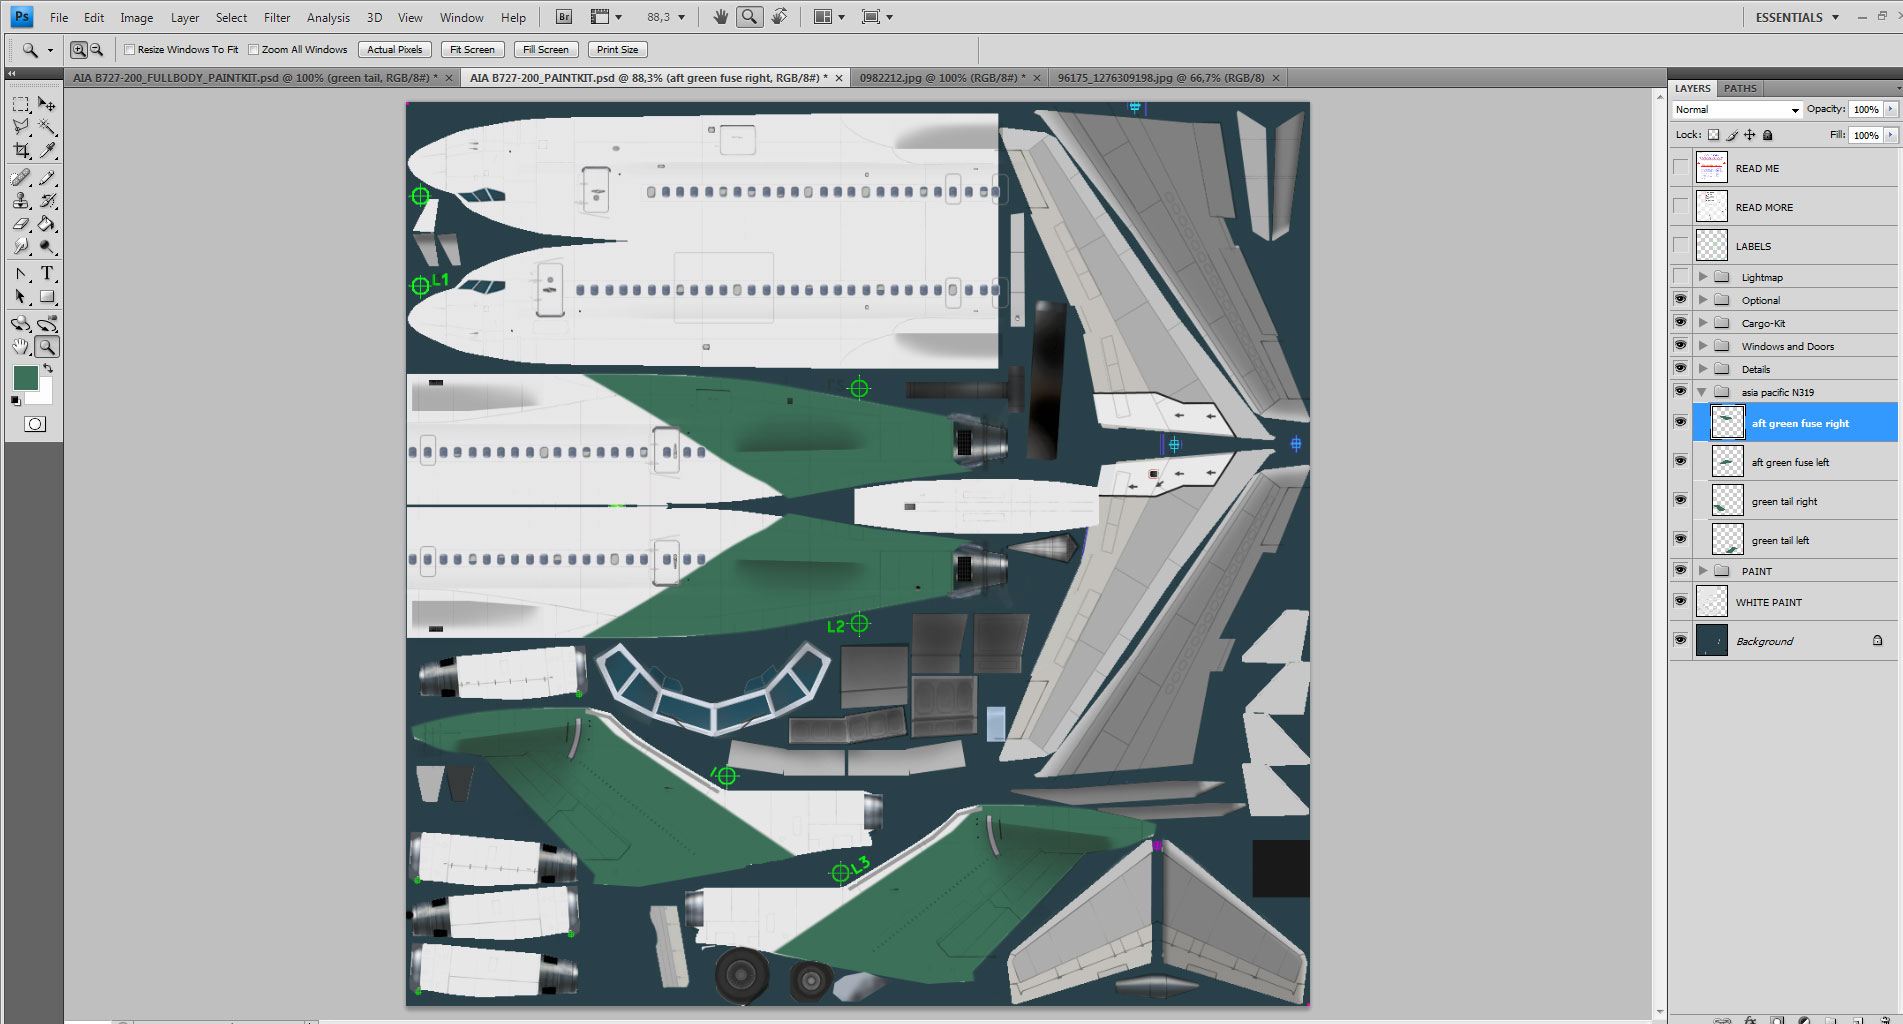
You will notice from the screenshot that I created a new layer group called asia pacific N319 and that I put our new layer inside it, and called the new layer “green tail left”, because, of course we will need a right texture as well. In most cases we will only need to duplicate and mirror the side we just made and paste it on the other side. You will also notice that in this case, I copied a bit too much of the original layer and that it is going way below the tail section. We will simply delete the unwanted portion, either using the eraser tool, or using the marquee tool to select the portion we want to get rid of and then delete it. Always make sure when you copy and paste layers that you don’t have loose colour bits that might end up on other pk parts without you noticing.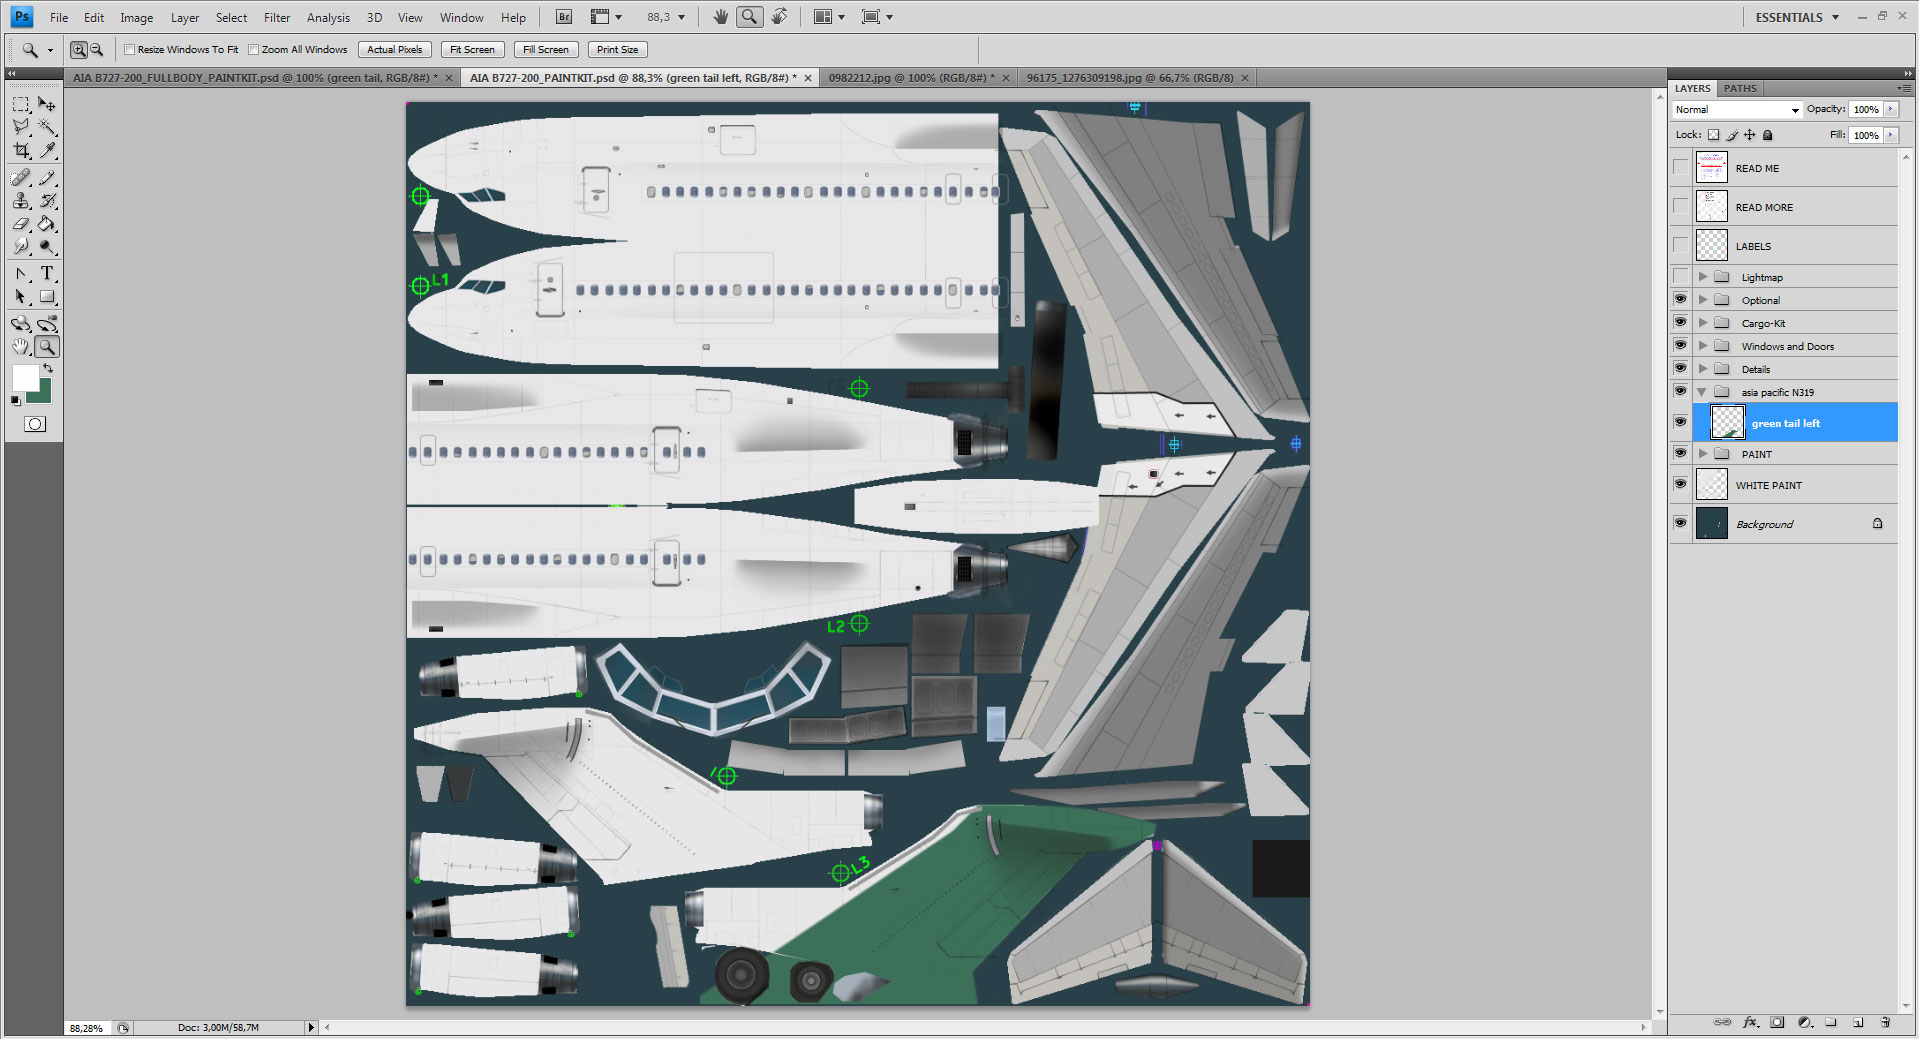
After we have tidied up our tail section paint, we will want to duplicate it and apply it to the other side of the tail. To do this, we will RIGHT click on the highlighted “green tail” layer in the layer palette, and a new drop down menu will appear. Select “duplicate layer” and a new window will pop up offering you the opportunity to name your new layer. By default, it will be “green tail left copy” but it makes sense that we rename it “green tail right”. By default, it will be duplicated in the same psd, but the lower “destination” frame gives you the option to actually duplicate this layer in any other psd document currently opened in PS. Obviously, right now we will keep the default settings and will copy it in the same document.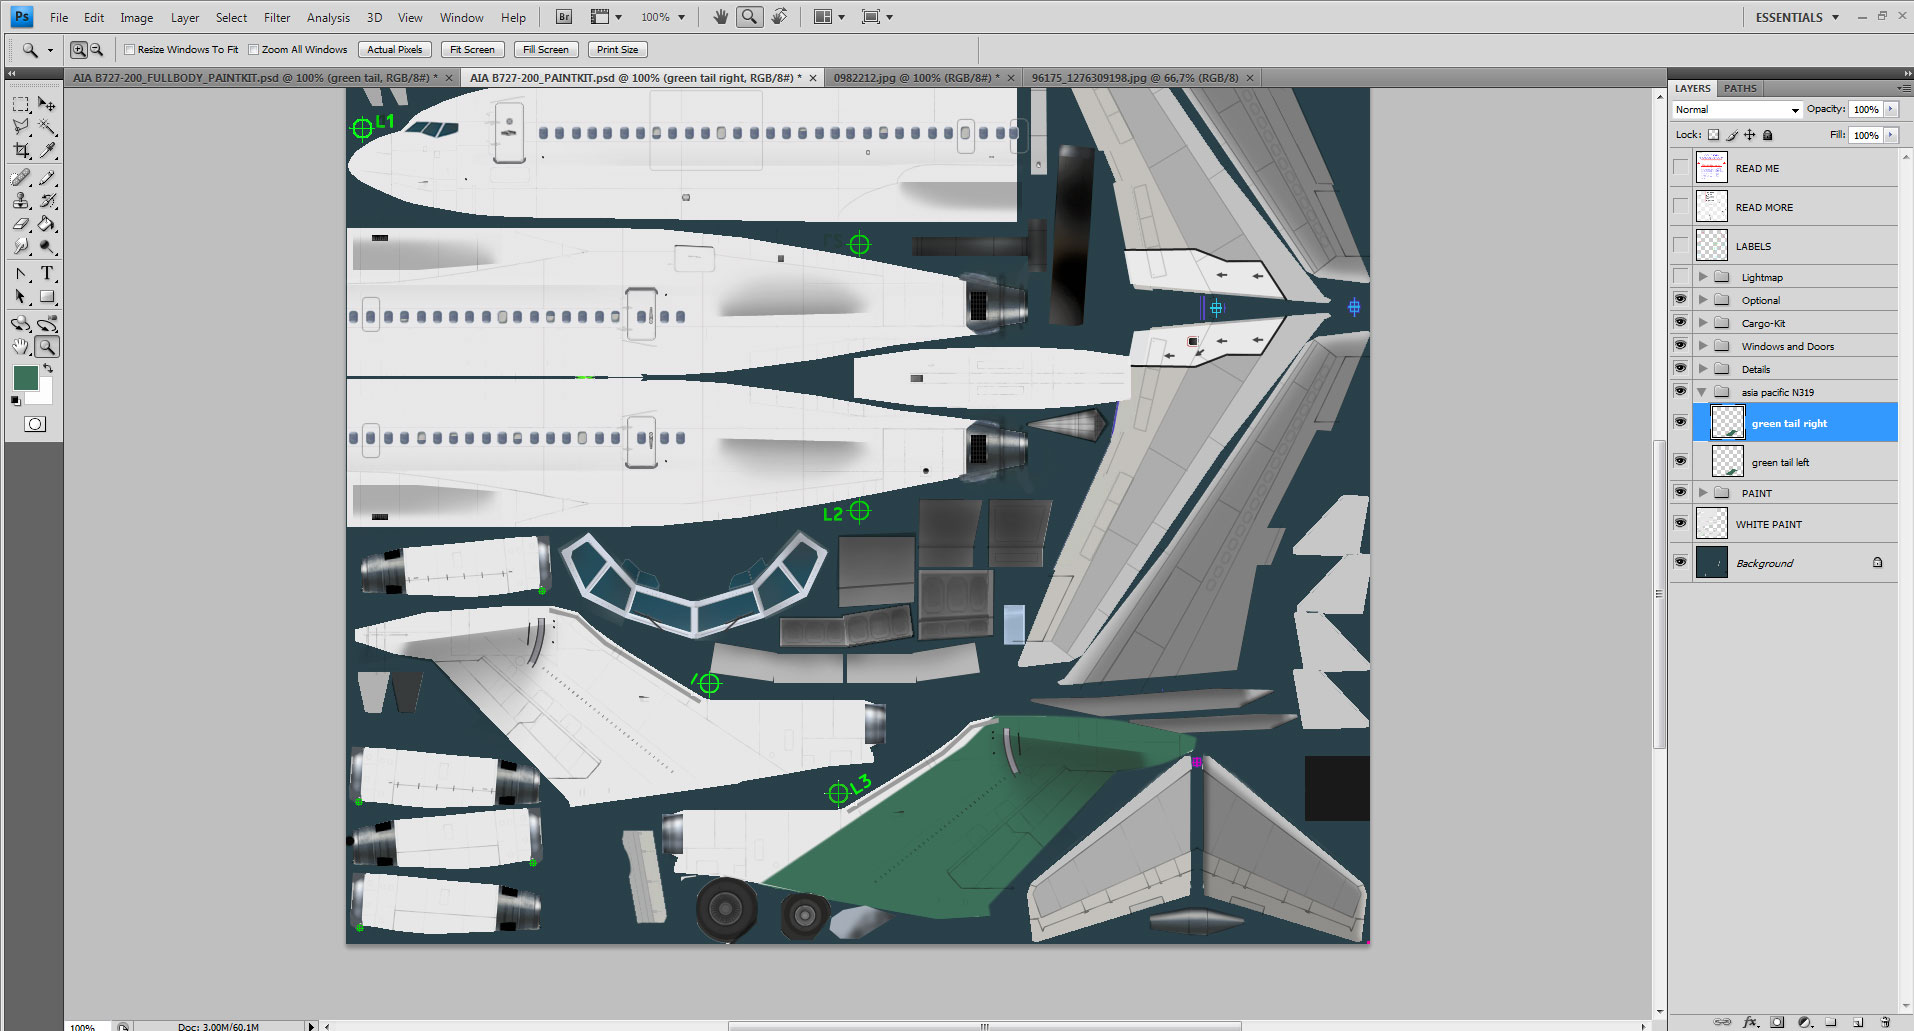
You will see in the screenshot above that we actually have a new layer highlighted and called green tail right, but you might not see the new layer in the pk, because it is duplicated exactly on top of the previous one, but it is there alright! We will need to mirror it to fit the other tail side. Making sure the new layer is still selected (highlighted in the layers palette) we will go to the upper menu and select Edit/transform/flip horizontal. Our layer is now facing the right direction, and we can move it to the right location using the move tool and the cross-hair mark to adjust the position. Now we can go back to the full fuselage psd to get the second part of our original green layer. Make sure that the “green tail” layer is still selected and use the marquee tool to select a portion covering the fuselage and a bit of the tail. As before, copy this part and paste it in the main pk, making sure the new layer is inside the group we are currently using. We will follow exactly the same steps as before, with the obvious exception that the last step will consist in mirroring the layer vertically and not horizontally, as you will notice that the fuselage sides are textured this way. So once we have positioned our new layer, and have duplicated it, we will go to the upper menu and select edit/transform/flip vertical. We will again use the location marks and the cross-hair to position the layer precisely and we should end up with something like this
We now have the livery background in place and we will be able to turn our attention to the titles and logo next.